E240: Manual Export
To configure a data backup:
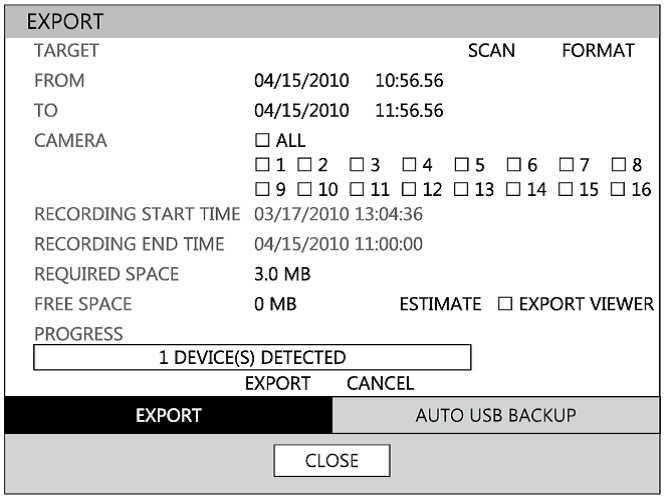
- Press BACKUP on the front panel or remote control.
- OR Click MENU on the hover menu and select BACKUP.
- Connect a USB device or insert a CD/DVD.
- Select SCAN to locate the device.
- Select the desired CAMERAs and the FROM and TO time for the backup.
- Select ESTIMATE to display estimated data size and free space available.
- Select the EXPORT VIEWER check box to add the Export Viewer to the backup file.
- Select EXPORT.
Back up recorded data on a CD-RW, DVD-RW or connected USB device.
Tip: Using this export method, video data is saved in a proprietary format and must be viewed using the Export Viewer software.
Note: The DVR supports DVD+R, and DVD-R. DVD-RW/+RW may not operate correctly.
Caution: Refer to the USB Flash Drive Approved List in the Introduction chapter. If you are using a new USB device to back up your data, you must format it first as FAT32.
Note: ESTIMATE must be selected first, before WRITE. If any backup parameters are changed (Date, Time, Channels) you must select ESTIMATE again.
Caution: Do not shutdown the system during the backup process.