EntraPass Go: Installation and Getting Started

1. Installing the Mobile App
On the App Store or Google Play Store, search for “EntraPass Go” and download the free mobile app.
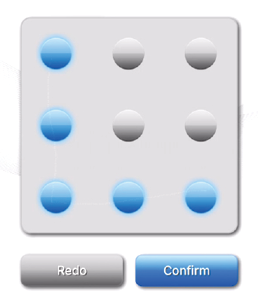
2. Set Up your Gesture
The first time you launch the app, you must set up a “Gesture” password of your choosing. Start at any dot and create a pattern that is easy for you to remember.
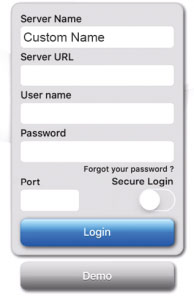
3. Add Your Site
In the “Server Name” field, enter a name for your site. This name is for your reference only.
Server URL, username, password, port, and login mode will be provided to you by our customer care team.
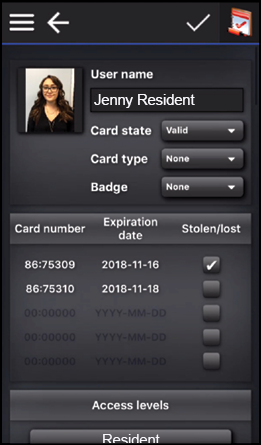
4. Add Users
After logging in, open the side menu by pressing the menu icon at the top left of the display.
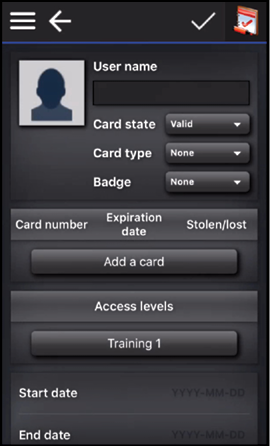
Press the blue ID card icon to add users.
- Enter the user's name.
- Select card type (optional)
- Enter a card number: Click "Add a card" and enter the card or keyfob's facility code followed by its unique identifier.
- Input the card's expiration date. Usually, the day after a resident's lease ends.
- Set access level: e.g. Resident, Employee, Manager, Vendor, etc.
- User Photo (optional): Click the blank user icon to access your phone camera and take a picture of the user.
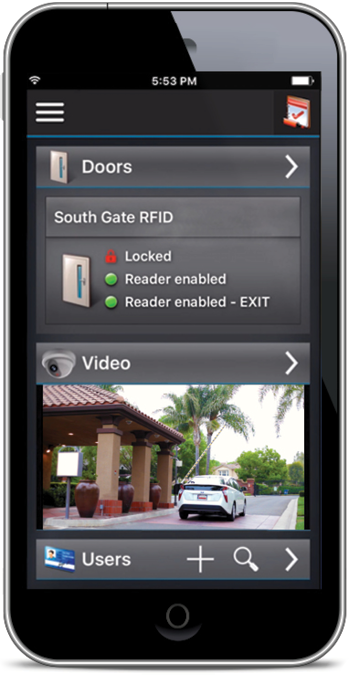
5. Controlling Doors
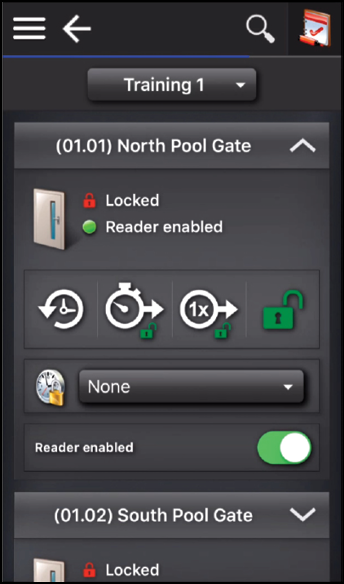
From the side menu, press the doors icon.
You are then presented with the door status and options from left to right:
- Back to Schedule: Set door settings to default operation.
- Temporary Unlock: Choose a period of time for which to unlock the door. The default is ten seconds.
- One Time Access: Opens the door once.
- Unlock: The door will remain unlocked until you lock it again. The icon switches to the Lock icon.
You can also change the access schedule and toggle the reader on or off.
6. Running Reports
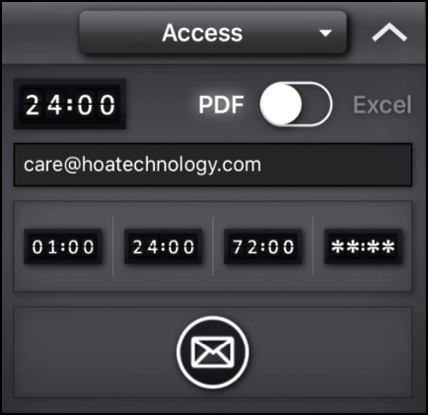
From the side menu, press the report icon. A list of available reports will display. Click on the dropdown on any report to adjust its settings.
- Select the report type: On the top bar, select the type of report to be run. Most commonly you will use the Access report.
- PDF or Excel Format: Sets format for the report.
- E-mail address: Report will be emailed to the address.
- Time Frame Selection: Choose between one hour, 24 hours, 72 hours, or custom.
- Send the report by pressing the mail icon. Your report settings will be saved for later use.
7. Additional Support
If you need assistance, send an e-mail to our customer care team at [email protected]