EntraPass Web Installation & Setup
1. Installing the app
For the installation process you must use Internet Explorer or Safari.
Visit entrapassweb.com
Microsoft Silverlight is required. If prompted to install Silverlight, follow the instructions to install Microsoft Silverlight before returning, return to entrapassweb.com to download and run the installer application.
After installing, launch EntraPass Web from your start menu or search bar.
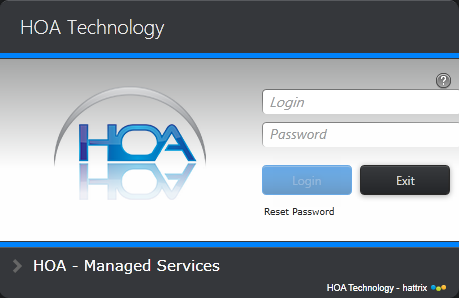
2. Log In
Enter the login and password which will be provided to you by our care team.
3. Add and Modify Users
From the top menu, click on Operation, then Edit Users.

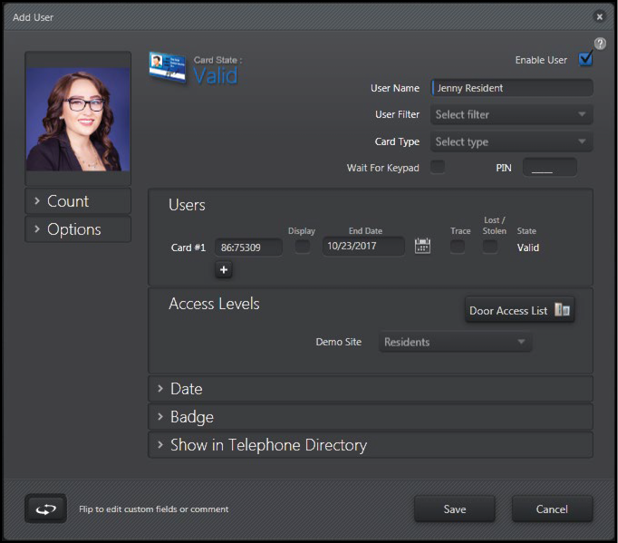
Press the Add button near the top right of the next screen to add a new user.
Enter the user’s name. Some sites assign a resident names, while others prefer to use a street address (particularly for large communities and apartments.)
Select card type. This dropdown menu may contain levels such as Resident, Administrator, Vendor, etc.
Enter a card number: Each card or keyfob has a 2-digit facility code, followed by a five digit unique identifier. You will usually find this code printed on the keyfob, keycard, or vehicular RFID sticker, or on the packaging for that ID.
End Date. This is an automatic expiration time for the credential. Usually, the day after a resident’s lease ends.
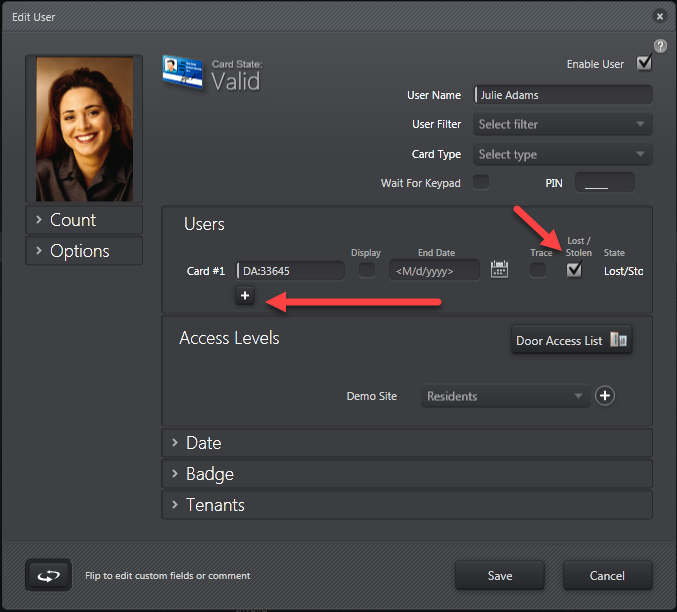
Flag Lost / Stolen: Do not simply delete lost or stolen cards; tag them here. In either case the card cannot obtain access, but if a card is marked as lost, you can view that card activity in reports and track such attempts.
Set access level: e.g. Resident, Employee, Manager, Vendor, etc. These levels can be set up under Configuration > Access Levels (see section #7 on this page). An access level is basically a group of time-dependent permissions for each access controlled door in the site. So a Resident access level might permit access to the exterior gates 24/7 and amenities from 6 am to 10 pm, where a Vendor might not have access to the amenities at all. It’s all up to you.
User Photo (optional): Click the blank user icon, then upload a photo or take a picture with a connected webcam.
User Information: Press the Flip icon at the bottom left corner to add custom information, such as address, contact information, and more. All labels can be customized by double clicking on the label name.
Editing a User
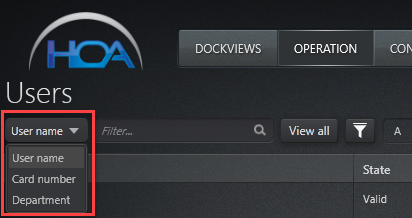
It’s easy to edit a user's credentials. Find the user to edit with the Users page search feature (under Operation > Users.)
You can search for users by user name, card number (if known), or department.
Double click on the user name. Then you will again be at the user's information. To add a keycard, click on the + icon beneath the user's existing card.
If you are issuing a user a new card because their previous card was lost, do not delete the previous card from the system. Simply mark it lost and add the new card number. That way, if someone attempts to use the lost keyfob, the system will recognize the card, deny access, and optionally send you an alert (ask the HOA Technology care team about setting up custom reports!)
4. Controlling Doors
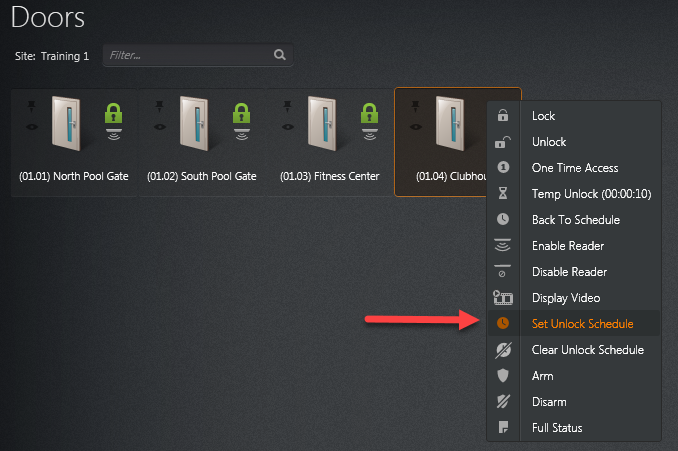
From the top menu, Operation > Control Doors. Right click on any door for a list of options.
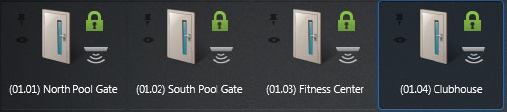
The door management display from the EntraPass Web access management software
Lock or Unlock.
One Time Access
Temporary Unlock: 10 seconds
Back to Schedule: Reverts door to its programmed schedule. Useful for troubleshooting.
Enable or Disable Reader: disabling the reader will prevent even valid users from entering areas.
Display Video: If video is available at the selected door.
Set or Clear Unlock Schedule: Establish your lock schedules under Configuration > Schedules.
Arm or Disarm the alarm at the door.
5. Running Reports
From the top menu, Operation > Run Reports. Then click on Quick Report.
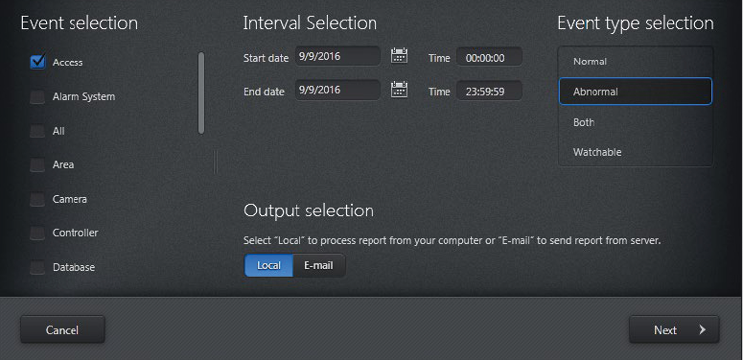
Event Selection: Select event types for which to run the report. Most commonly you will only need the Access report.
Interval Selection: Set the date and time for the start and end of the report.
Event Type Selection: Most commonly you will need Abnormal reports to find unusual activity.
Press Next.
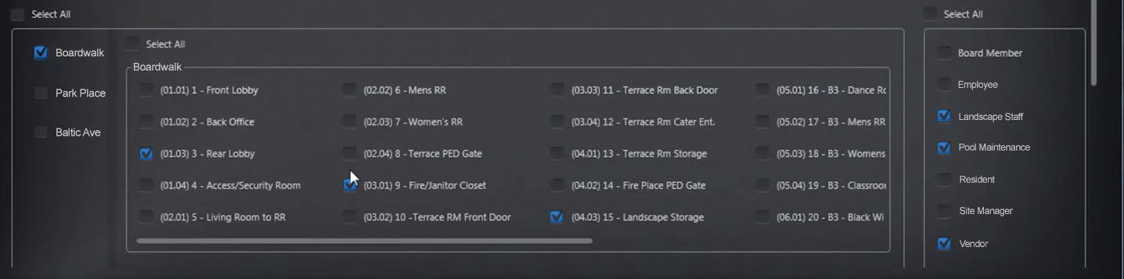
Select your sites on the left.
Select doors and access points for which to run the report.
Select user types for which to run the report on the right. Click Next at the bottom right.
Your report will generate. At the bottom of the report page, see options to save a PDF or Excel file, or to print the report.
6. Advanced: Setting up Schedules
To set up a new door schedule, go to Configuration > Schedules.
Press the Add button to add a new schedule.
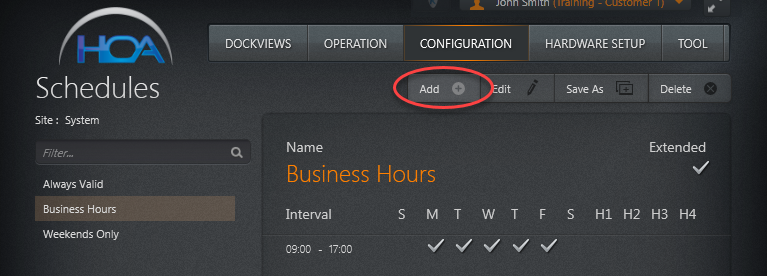
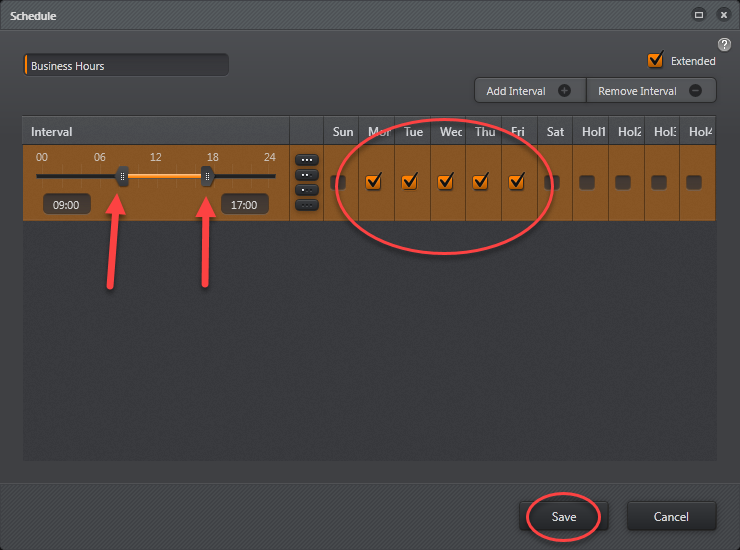
Configure your schedule.
Name your schedule at the top. Select the days for which the schedule applies. Then select a time interval.
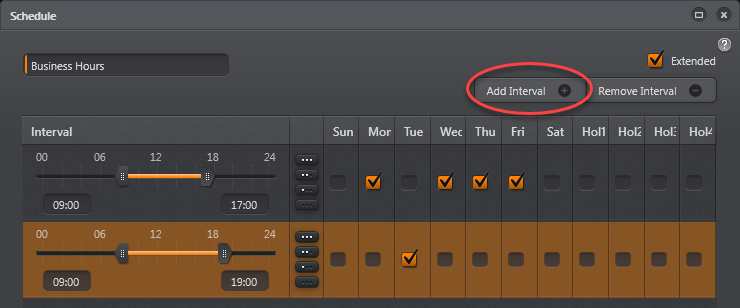
For more complex schedules, add a new interval.
It is easy to establish variant times for different days. For example, the schedule below shows that “Business Hours” are 9:00 am to 5:00 pm most weekdays, but 9:00 am to 7:00 pm on Tuesday.
To set an unlock schedule…
Simply right click on a door (under Operation > Control Doors) to select the schedule. Please note that this means that for the times selected, the door will be completely unlocked: i.e., no swipe will be needed. This is ideal for places you want to be completely accessible to the public at certain times of day, such as a sales lobby.
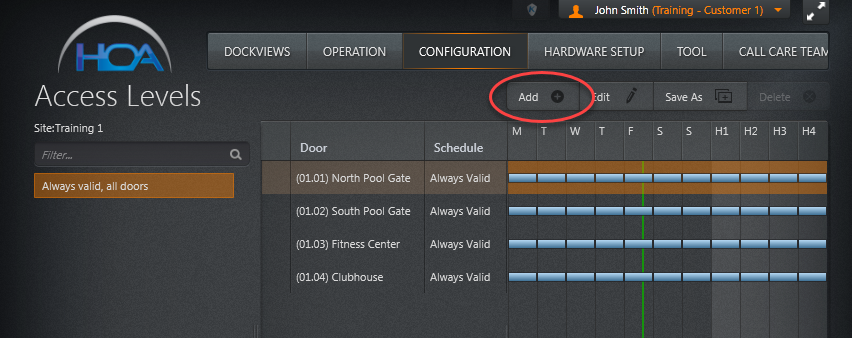
7. Set Up Access Levels
This Go to Configuration > Access Level on the top menu.
An access level contains a schedule for each door in the community. A user with the selected access level can open a door with their credential only on times permitted by the door’s schedule.content will show up directly in its container.
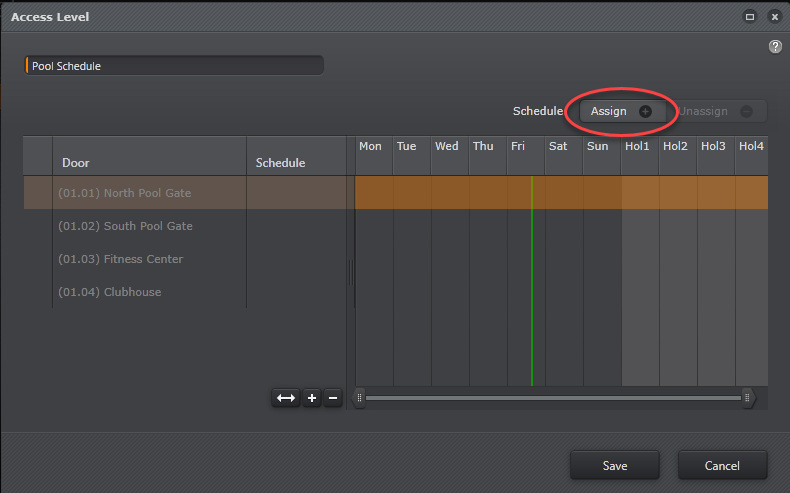
For each door you want to manage with the new access level, select the door and click on Assign. This connects it to a schedule.
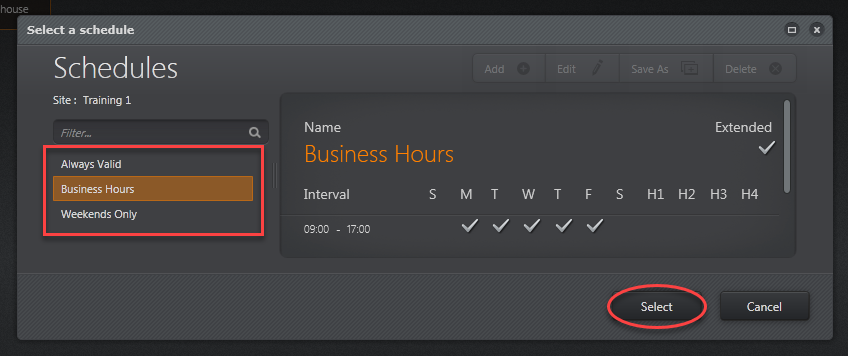
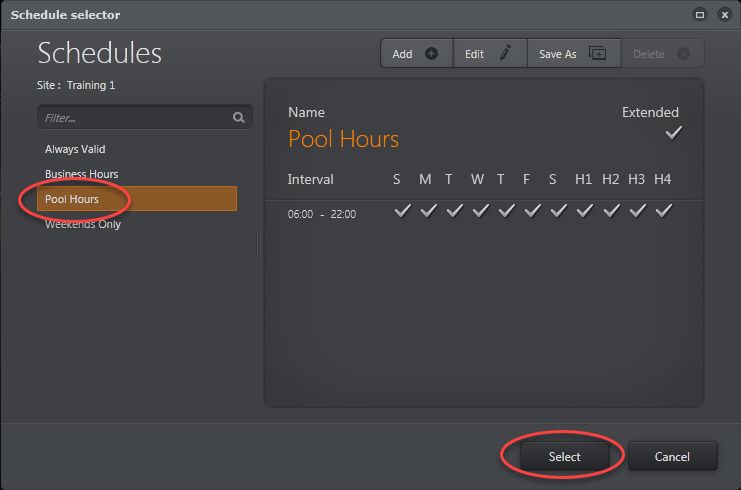
Select the schedule you want in the Schedule Selector window that appears. In this case, we select Pool Hours.
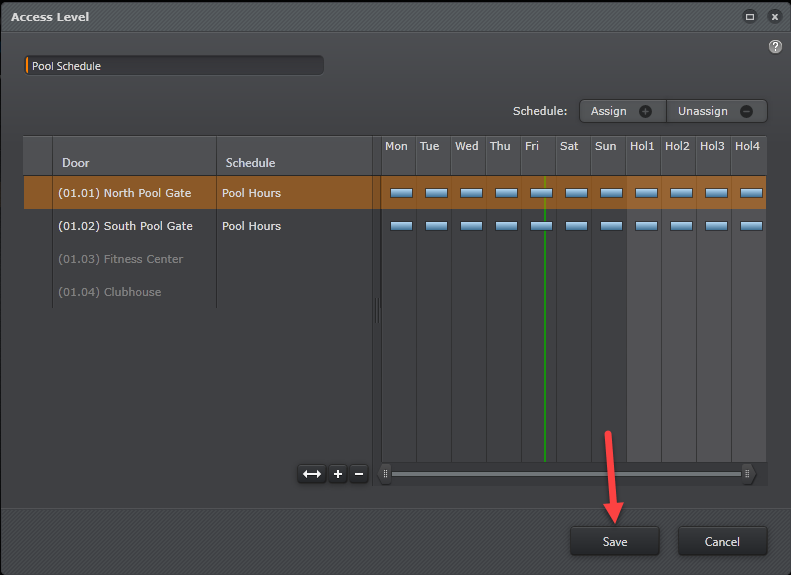
Click Select to assign the schedule to the door. When you are done setting the Access Level schedule for each door you want to modify, double check that you have set the schedules you want, and press Save.
8. Additional Support
If you need assistance, send an e-mail to our customer care team at [email protected]